


Learn how to cook dried chickpeas and freeze them for convenient, future use! This step-by-step guide covers cooking methods like stovetop, Instant Pot, and slow cooker. You'll also discover the best ways to store and freeze cooked chickpeas, prevent freezer burn, and reduce food waste while keeping these protein-packed legumes fresh and ready for meal prep or recipes down the road!

Chickpeas, also known as garbanzo beans, are one of the most versatile protein-packed legumes found in kitchens around the world. Whether you know them as Egyptian peas, Bengal gram, or simply chickpeas, they come in a variety of colors including green, white, and brown. Chickpeas are a staple in many global cuisines, especially in Mexican and Indian dishes, where even chickpea flour plays a major role in the kitchen.
If you feel guilty about relying on canned chickpeas, don't worry! You can easily prepare dried chickpeas at home and freeze them for later use. The cooking process for dried chickpeas is simple and can be applied to other dried beans such as black beans, red beans, and butter beans. With just a few easy steps, you can cook chickpeas to perfection and store them in your freezer, always ready for any recipe. This method results in chickpeas that taste fresher, have a better texture, and can easily be incorporated into your favorite dishes.
Jump to:
- All About Chickpeas
- Pros of Dried Chickpeas vs Canned Chickpeas
- Quantities - Dried Chickpeas to Cooked Chickpeas
- Ingredients
- How to Soak Dried Chickpeas
- How to Cook Dried Chickpeas
- Chef's Tips
- How to Peel Chickpeas
- How to Use Chickpeas
- How to Store and Freeze Chickpeas
- FAQ's
- How to Cook Dried Chickpeas (+ freezing tips for meal prep)
All About Chickpeas
- Chickpeas have a buttery, nutty flavor and a creamy texture, making them a delicious addition to many dishes.
- Like other legumes, chickpeas are rich in dietary fiber and protein, providing essential nutrients.
- They contain several key vitamins and minerals, contributing to their status as a superfood.
- Chickpeas are particularly beneficial for vegetarians and vegans since they are rich in plant-based protein.
- Their nutritious profile offers numerous health benefits, supporting overall well-being.
Pros of Dried Chickpeas vs Canned Chickpeas
- Shelf life: Dried chickpeas can be stored for a long time, making them a convenient pantry staple.
- Absence of chemicals and preservatives: Unlike canned varieties, dried chickpeas are free from added chemicals or preservatives.
- Control the sodium: Cooking dried chickpeas at home allows you to control the amount of sodium, unlike many canned options.
- Taste: Dried chickpeas provide a fresher, more robust flavor and texture compared to canned chickpeas.
- More economical than canned chickpeas: Dried chickpeas are more affordable and provide better value over time.
- BPA from the can liners: Dried chickpeas avoid the risk of BPA exposure from the linings of canned chickpeas.
Quantities - Dried Chickpeas to Cooked Chickpeas
- 450g (1 lb.) dried chickpeas yields 1.4 kg (3 lb. 4 oz) cooked chickpeas.
- 1 cup of dried chickpeas yields about 3 cups of cooked chickpeas.
- A common issue with freshly cooked chickpeas: how much to use when a recipe calls for "1 can of chickpeas." Here's the answer: 1 can of chickpeas equals 245 g (8.6 ounces) drained mass.
- For freezing, measure the equivalent of 1 can of chickpeas per freezer bag or airtight container for convenience.
Ingredients

- Dried chickpeas: The star of the recipe, providing a nutty flavor and creamy texture when cooked.
- Bay leaf (optional): Adds a subtle depth of flavor, perfect for enhancing the chickpeas during cooking.
- Garlic cloves (optional): Infuses the chickpeas with a mild, savory taste as they cook.
- Onion (optional): Adds sweetness and aroma, helping to develop a richer flavor in the chickpeas.
- Salt: Used to season the chickpeas toward the end of cooking, ensuring a balanced taste.
How to Soak Dried Chickpeas
You don't have to soak chickpeas before cooking, but they cook much faster once soaked. If you don't soak them, expect the cooking time to double. Soaking also helps remove some phytic acid found in dry beans, making them easier to digest. Soaked beans plump up without splitting during cooking, making them more appealing.
Soak the chickpeas using one of the following two methods:
Long Soak (this is our preferred way)


- Add the dried chickpeas to a large bowl and cover with double the amount of cold water.
- Allow to soak at room temperature overnight or for at least 12 hours. (The chickpeas will triple in size so make sure you use a big enough bowl and that you add enough water to the bowl.)
- Drain and rinse the soaked chickpeas under cold running water. (Don't use the soaking water as your cooking liquid.)
Quick Soak Method
- Add chickpeas to a large saucepan and cover with at least 7,5 cm (3 inches) of water.
- Bring the chickpeas to the boil. Boil rapidly for 5 minutes.
- Remove from heat and cool for 1 hour in the soaking water.
- Drain and rinse the soaked chickpeas under cold running water.
How to Cook Dried Chickpeas
You can cook soaked chickpeas using three different methods: stovetop, Instant Pot (or pressure cooker), and slow cooker. Each method offers flexibility based on your kitchen setup and time availability.
Stovetop Method


- Place the soaked chickpeas and the aromatics (if using) into a large pot. Don't add salt at this point. Salt toughens the skins of the chickpeas. Cover with cold water.
- Bring to a boil. Use a spoon or ladle to skim off any foam on top and discard it.
- Then reduce to a simmer and cook covered for 1 - 2 hours, or until soft (but not mushy). Check the water level every 30 minutes and add more water if needed.
- Season with salt in the last 15 minutes of the cooking process.
- When the chickpeas are cooked, drain the chickpeas and remove the aromatics before serving.

Instant Pot / Pressure Cooker
- Cover rinsed and soaked chickpeas with 1,5 liters (6 cups) of cold water and add aromatics (if using).
- Set the Instant Pot to High Pressure. Adjust the timer to 20 minutes. When the cooking time is up, turn off the Instant Pot. Release the pressure manually 10 minutes after the beep. (Be careful of the steam)
- Drain the chickpeas and remove the aromatics before serving.
Slow Cooker /Crock Pot
- Place the soaked chickpeas and the aromatics (if using) into the slow cooker. Don't add salt at this point. Salt toughens the skins of the chickpeas.
- Cover with 2 l (8 cups) of boiling water and cook on high heat.
- Cooking time can vary from 4 - 8 hours. Slow cookers vary in strength and power. Start checking for doneness after 4 hours.
- Season with salt in the last 15 minutes of the cooking process.
- When the chickpeas are cooked, drain the chickpeas and remove the aromatics before serving.
Chef's Tips
- Soaking chickpeas overnight is the best way to reduce cooking time and achieve a more even texture.
- Avoid adding salt too early in the cooking process as it can toughen the chickpeas' skins.
- Batch cooking chickpeas is a great way to save time for future recipes like hummus or stews. Store extras in the freezer using freezer bags or an airtight container for later use.
How to Peel Chickpeas

Skins on chickpeas can be tough and add a dull flavor, so removing them is ideal for certain recipes. For hummus, peeled chickpeas are key to achieving a smooth texture and a luscious flavor. In dishes like bulgur pilaf, peeled chickpeas are preferred because the skins easily fall off during cooking and can be unattractive in the dish.
- There are two easy ways to do this: Either 'pop' the chickpeas out of their skins or spread them between two clean tea towels. Gently rub the towels together, (be careful not to crush the chickpeas) the friction should cause the skins to come off.
- Discard the chickpea skins.
How to Use Chickpeas
Chickpeas are a key ingredient in Mediterranean and Middle Eastern cuisines. They are essential for making homemade creamy hummus.
With the growing popularity of chickpeas, there are many creative ways to incorporate them into dishes.
- Add chickpeas to salads, soups, curries, and stews for extra protein and texture.
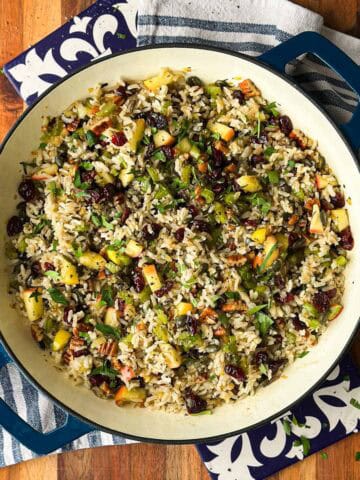
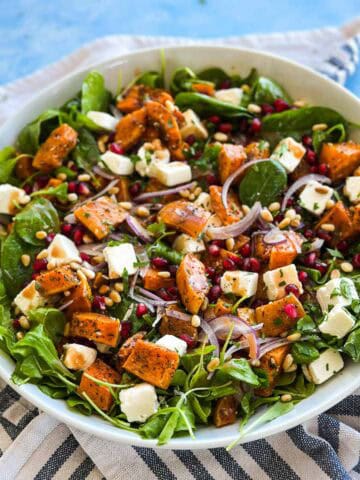
- Chickpeas can be used in a variety of recipes. Why don't you try our:
How to Store and Freeze Chickpeas
Best Way to Store Chickpeas
- Dried chickpeas: Store in the pantry for up to 12 months in an airtight container or glass jar.
- Canned chickpeas: Store in the pantry indefinitely. Once opened, refrigerate for 3-4 days.
- Cooked chickpeas: Last 3-4 days in the refrigerator, store drained or in their cooking liquid inside an airtight container.
- Soaked chickpeas: Keep in the refrigerator for 3-4 days or sprout them on the countertop for 4 days at room temperature.
- Chickpea cooking liquid (aquafaba): Refrigerate for 3-4 days-a great vegan egg substitute when making mayonnaise.

How to Freeze Chickpeas
- Cooked chickpeas can be stored in the freezer for 3-4 months.
- Drain, then pat dry using kitchen towels.
- Freeze on a baking sheet in a single layer to prevent clumping.
- Freeze for 2-3 hours until firm, ensuring they don't stick together.
- Transfer the chickpeas to an airtight container or freezer bags.
- Thaw in the refrigerator for use.
- Chickpeas will have a softer texture after freezing, making them ideal for dips or dishes that don't require a firm bean.
How to Use Frozen Chickpeas
- Microwave chickpeas to bring them to room temperature.
- They can also be defrosted overnight in the refrigerator.
- You can use them directly in stews or curries, just like you would frozen green peas.
FAQ's
A : Chickpeas may not soften if they are too old, as dried beans can become harder with age. Using salt or acidic ingredients too early in the cooking process can also prevent them from softening.
A : Adding a small amount of baking soda to the cooking water can help soften dried chickpeas by breaking down their skins, especially if the beans are older.
A : Yes, the same soaking and cooking methods can be applied to other dry beans like black beans, butter beans, and red beans.
A : Leftover chickpeas can be added to salads, turned into hummus, or tossed into soups and curries. You can also freeze them for later use.

Freezing chickpeas is a simple and effective way to ensure you always have this protein-packed legume ready for your favorite recipes. Whether you're making hummus, a Mediterranean stew, or adding chickpeas to your salads, following these steps will help you cook and store them properly and reduce food waste.
Try cooking and freezing your own batch of dried chickpeas today to see the difference in taste and texture!
Enjoy!
Print
How to Cook Dried Chickpeas (+ freezing tips for meal prep)
- Total Time: 1 - 2 hours (+soaking)
- Yield: 6 cups
- Diet: Vegan
Description
Learn how to cook dried chickpeas and freeze them for convenient, future use! This step-by-step guide covers cooking methods like stovetop, Instant Pot, and slow cooker. You'll also discover the best ways to store and freeze cooked chickpeas, prevent freezer burn, and reduce food waste while keeping these protein-packed legumes fresh and ready for meal prep or recipes down the road!
Ingredients
375 g (2 cups) Dried Chickpeas
1 Bay Leaf (optional)
2 Garlic Cloves, peeled (optional)
1 Onion, peeled and halved (optional)
Salt
Instructions
Soak the Dried Chickpeas
Two Ways to Soak the Chickpeas:
Long Soak (this is our preferred way)
-
Add the dried chickpeas to a large bowl and cover with double the amount of cold water.
-
Allow to soak at room temperature overnight or for at least 12 hours. (The chickpeas will triple in size so make sure you use a big enough bowl and that you add enough water to the bowl.)
-
Drain and rinse the soaked chickpeas under cold running water. (Don't use the soaking water as your cooking liquid.)
Quick-Soak Method
-
Add chickpeas to a large saucepan and cover with at least 7,5 cm (3 inches) of water.
-
Bring the chickpeas to the boil. Boil rapidly for 5 minutes.
-
Remove from heat and cool for 1 hour in the soaking water.
-
Drain and rinse the soaked chickpeas under cold running water.
Cook the Chickpeas
Three Ways to Cook the Soaked Chickpeas:
Stovetop Method
-
Place the soaked chickpeas and the aromatics (if using) into a large pot. Don't add salt at this point. Salt toughens the skins of the chickpeas. Cover with cold water.
-
Bring to a boil. Use a spoon or ladle to skim off any foam on top and discard it.
-
Then reduce to a simmer and cook covered for 1 - 2 hours, or until soft (but not mushy). Check the water level every 30 minutes and add more water if needed.
-
Season with salt in the last 15 minutes of the cooking process.
-
When the chickpeas are cooked, drain the chickpeas and remove the aromatics before serving.
Instant Pot / Pressure Cooker
-
Cover rinsed and soaked chickpeas with 1,5 liters (6 cups) of cold water and add aromatics (if using).
-
Set the Instant Pot to High Pressure. Adjust the timer to 20 minutes. When the cooking time is up, turn off the Instant Pot. Release the pressure manually 10 minutes after the beep. (Be careful of the steam)
-
Drain the chickpeas and remove the aromatics before serving.
Slow Cooker /Crock Pot
-
Place the soaked chickpeas and the aromatics (if using) into the slow cooker. Don't add salt at this point. Salt toughens the skins of the chickpeas.
-
Cover with 2 l (8 cups) of boiling water and cook on high heat.
-
Cooking time can vary from 4 - 8 hours. Slow cookers vary in strength and power. Start checking for doneness after 4 hours.
-
Season with salt in the last 15 minutes of the cooking process.
-
When the chickpeas are cooked, drain the chickpeas and remove the aromatics before serving.
Notes
Storage Instructions
Fridge: Store drained or in their cooking liquid inside an airtight container for 3-4 days.
Freezer: Store in airtight containers or freezer bags for 3-4 months.
- Prep Time: 5 minutes
- Soaking Time: Overnight
- Cook Time: 1 - 2 hours
- Category: Side Dishes
- Method: Stovetop
- Cuisine: Mediterranean
Nutrition
- Serving Size: 1 serving
- Calories: 56
- Sugar: 1.9 g
- Sodium: 51.1 mg
- Fat: 0.8 g
- Carbohydrates: 9.6 g
- Protein: 2.9 g
- Cholesterol: 0 mg
The nutrition is an estimate only. It was calculated using Nutrifox, an online nutrition calculator.



Leave a Reply