


This Moroccan bread recipe (Khobz Kesra) makes soft, round loaves that are golden on the outside and fluffy on the inside. Baked fresh at home, this authentic khobz is perfect for scooping up tagines, dipping, or serving alongside appetizers or grilled meats. A staple of Moroccan cuisine, it's simple to make with just a few pantry ingredients.

My husband and I spent a couple of weekends cooking our way through a collection of Moroccan recipes recently - and this rustic Moroccan bread recipe was the final piece of the puzzle. We made everything from Toasted Moroccan Couscous to zesty Preserved Lemons and even our own homemade Tagine Spice Mix, but every dish felt like it was waiting for the warm, round loaves of bread that are such an essential part of Moroccan cooking.
This recipe includes methods for both traditional hand kneading and using a stand mixer with a dough hook, so you can choose whichever works best for you. Either way, you'll end up with golden, rustic rounds of khobz that are perfect for serving alongside your favorite Moroccan dishes.
Scroll down for step-by-step photos, helpful tips, and fun flavor variations!
Jump to:
- What is Traditional Moroccan Bread?
- Ingredients You'll Need
- How to Make Moroccan Bread
- Cool and serve
- Flavor Variations, Substitutions, and Tips
- What to Serve With Moroccan Bread
- Storage and Make-Ahead Instructions
- FAQ's
- More Moroccan Recipes
- Moroccan Bread Recipe (Khobz Kesra)
- Method 1: Traditional Hand Kneading
- Method 2: Stand Mixer with Dough Hook
What is Traditional Moroccan Bread?
In Morocco, bread is more than food - it's part of daily life. Known as khobz, kesra, or simply "Moroccan flatbread," these loaves are baked fresh each day and often used as an edible utensil to scoop up sauces, dips, and salads. Making it at home reminded us of the warmth and hospitality we love about Moroccan cooking.
What's the difference between pita and Khobz?
While both breads are perfect for dipping and scooping, khobz is a thicker, round loaf with a rustic crumb, while Pita Bread is thinner and known for its pocket.
If you're a fan of homemade flatbreads, you might also enjoy trying our soft Easy Pita Bread Recipe or fluffy Turkish Flatbread (Bazlama) for variety.
Ingredients You'll Need
This Moroccan bread is made with simple ingredients you probably already have in your kitchen.
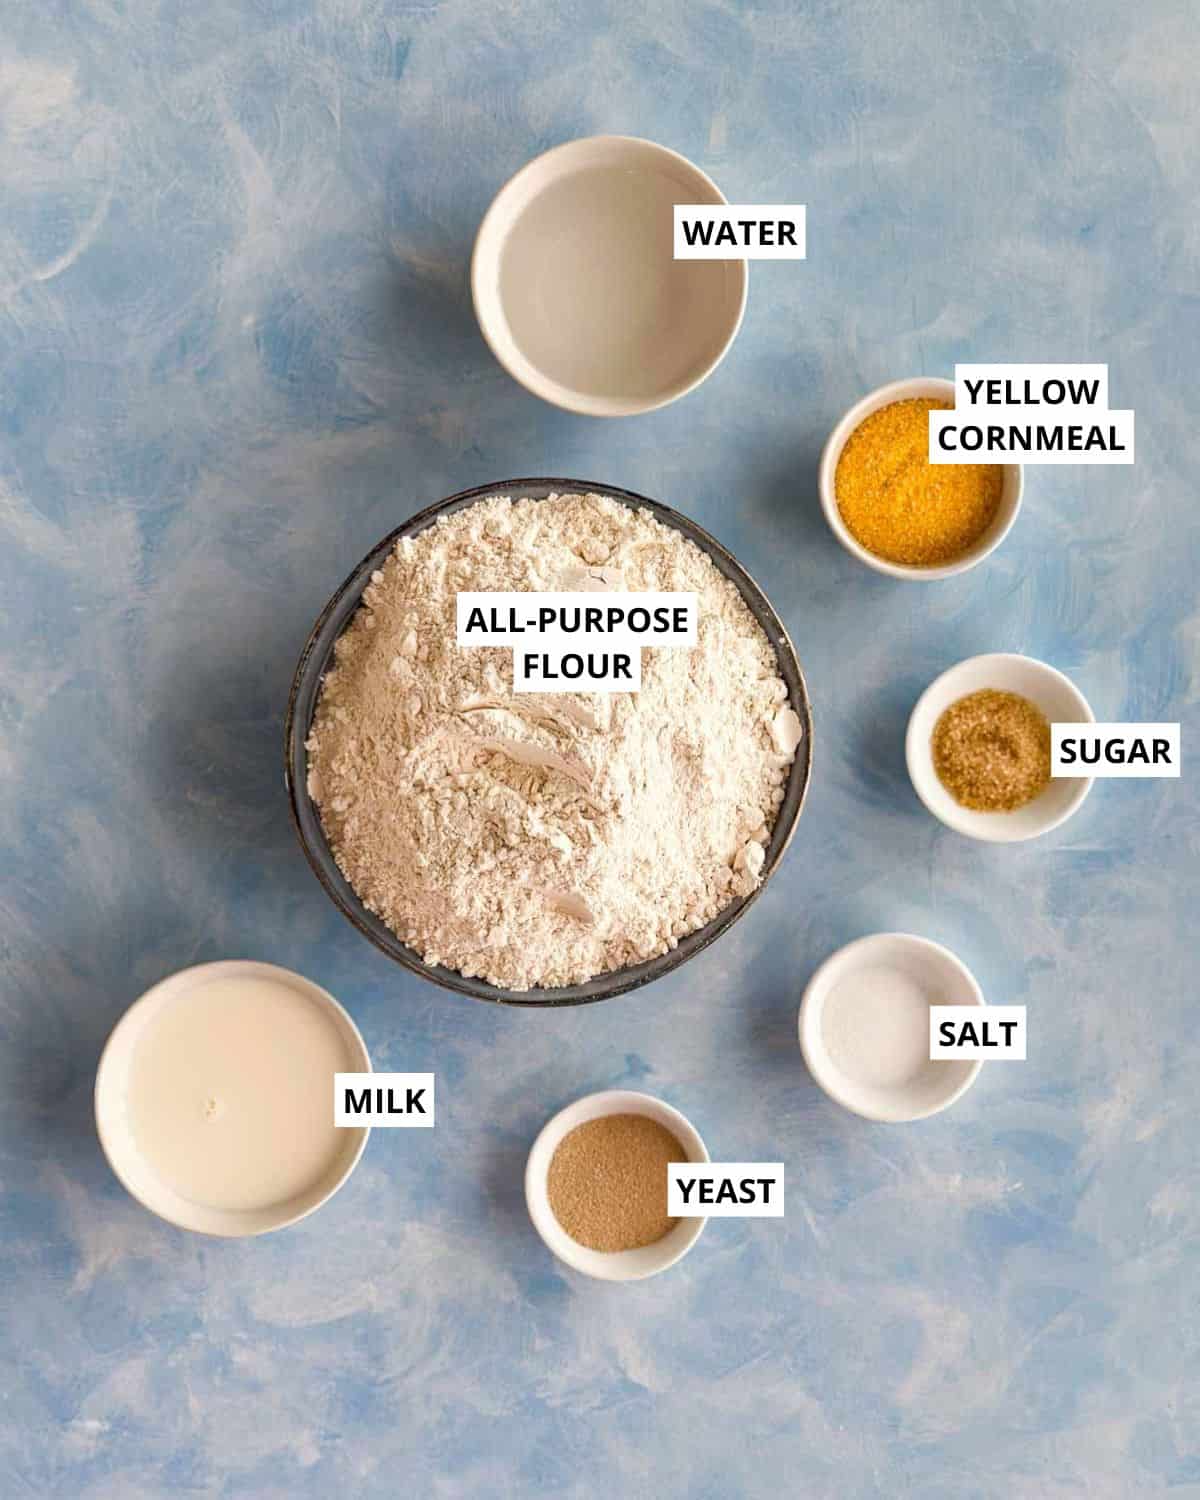
- Active dry yeast - Gives the bread its rise and airy texture.
- Sugar - Feeds the yeast and helps it activate.
- Lukewarm water + milk - Warm liquids are essential for creating soft, tender dough and helps activate the yeast.
- All-purpose flour - The base of the dough, giving structure and softness.
- Salt - Enhances flavor.
- Yellow cornmeal (or fine polenta) - Sprinkled on the tray to prevent sticking and add a rustic crunch.
- Optional toppings - Sesame seeds, aniseed, or a sprinkle of salt for flavor and texture.
See the recipe card for quantities.
How to Make Moroccan Bread
Tested in our kitchen and loved by our readers-this recipe is easy to follow and produces beautifully golden, Moroccan khobz every time.
Method 1: Stand Mixer with Dough Hook
Activate the yeast
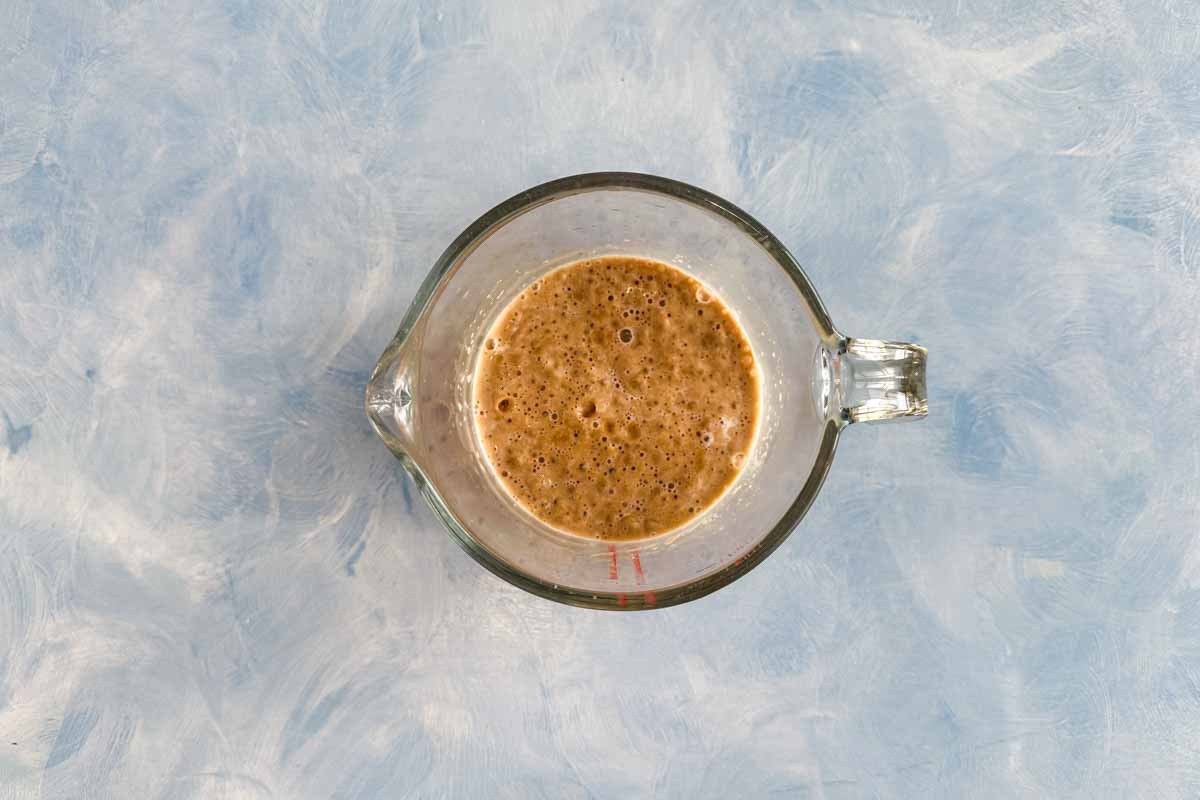
- In a small bowl, combine the yeast, sugar, and 125 ml (½ cup) lukewarm water.
- Let it sit for 5-10 minutes, until foamy and bubbly.
Chef's Tip: The water should feel just warm to the touch (about 38-40°C / 100-105°F). If it's too hot, it can kill the yeast.
Mix the dough


- In the bowl of a stand mixer fitted with the dough hook, combine the sifted flours and salt.
- Add the activated yeast mixture, then pour in 250 ml (1 cup) lukewarm water and 125 ml (½ cup) lukewarm milk.
- Mix on low speed for 1-2 minutes until a shaggy dough forms.
Chef's Tip: Always start mixing on low speed to avoid flour flying everywhere, then increase gradually.
- Cover the bowl with a clean kitchen towel and set aside for 15 minutes.
Knead the dough


- On a medium speed, knead for 6-8 minutes, or until the dough is smooth, elastic, and pulls away from the sides of the bowl.
Chef's Tip: Stop the mixer halfway through and scrape down the sides of the bowl to ensure even gluten development.
- If the dough is still sticky after a few minutes, add a tablespoon or two of extra all-purpose flour.
Shape the loaves


- Divide the dough into 3 even pieces.
- Shape each into a round ball, then roll out on a floured surface into rounds about 23 cm (9 in) for thicker bread or 26 cm (10½ in) for thinner loaves.
Chef's Tip: To get even rounds, rotate the dough in a circular motion under your cupped hand until it tightens into a smooth ball.
Chef's Tip: Lightly flour your hands when handling the dough to prevent sticking, but don't add too much flour or the loaves may become dense.
Rise


- Sprinkle baking trays lined with parchment paper with cornmeal. Place the shaped rounds onto the trays. Reshape if needed.
- Brush the tops lightly with water and, if using, sprinkle with aniseed, sesame seeds, or salt, pressing lightly to stick.
- Cover with clean kitchen towels and leave in a warm, draft-free spot for about 1 hour, or until a slight indentation remains when pressed with your fingertip.
Preheat the oven
- While the bread is rising, preheat the oven to 220°C / 425°F / Gas 7.
Prick and bake
- Just before baking, prick the tops of the breads with a fork dipped in a little all purpose flour.
- Bake in the preheated oven for 12-15 minutes, or until golden and the base sounds hollow when tapped.
Cool and serve
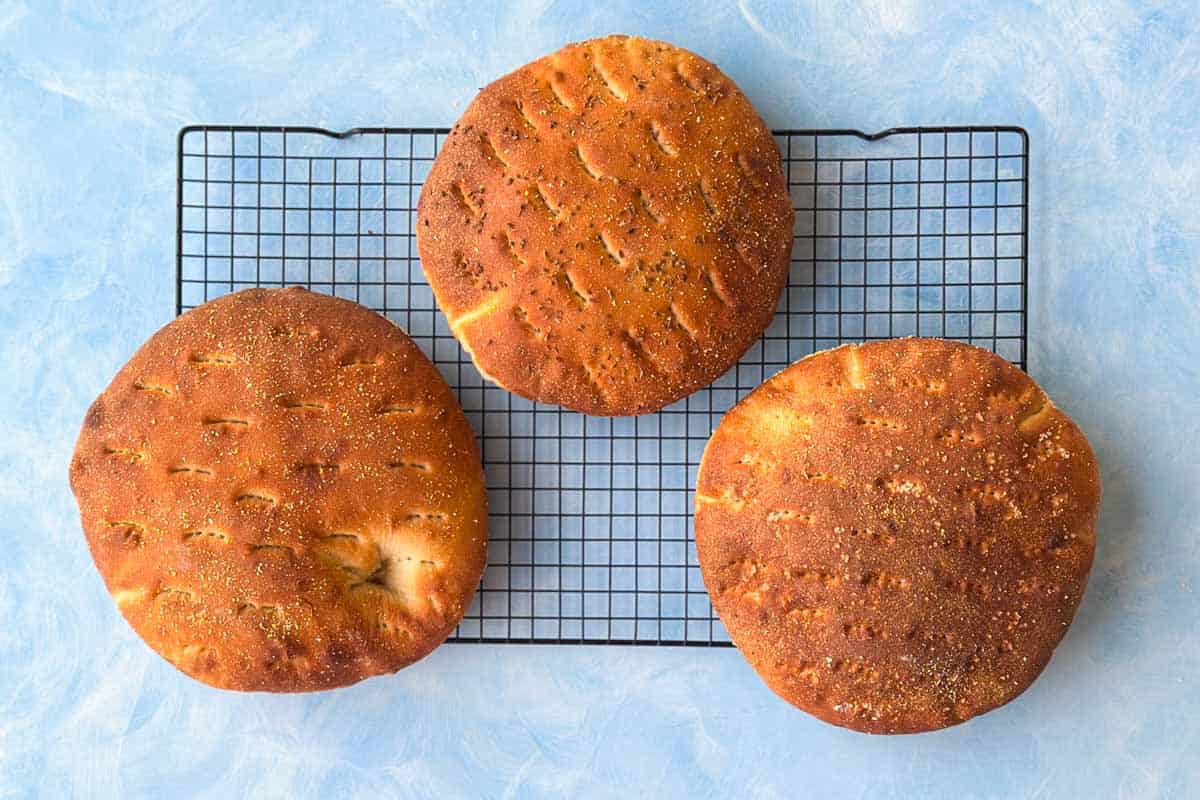
- Transfer the loaves to a wire rack and allow to cool slightly.
- Cut into wedges and serve the same day.
Method 2: Traditional Hand Kneading
Activate the yeast
- In a small bowl, combine the yeast, sugar, and 125 ml (½ cup) lukewarm water.
- Let it sit for 5-10 minutes, until foamy and bubbly.
Chef's Tip: The water should feel just warm to the touch (about 38-40°C / 100-105°F). If it's too hot, it can kill the yeast.
Mix the dough
- In a large bowl, sift both the flours and salt together.
- Make a well in the center and add the activated yeast mixture, then add 250ml (1 cup) lukewarm water and 125 ml (½ cup) of lukewarm milk.
- Mix with your hand or a wooden spoon until a shaggy dough forms.
- Cover the bowl with a clean kitchen towel and set aside for 15 minutes.
Chef's Tip: Resting the dough for 15 minutes before kneading (called autolyse) helps hydrate the flour before kneading.
Knead the dough
- Turn the dough out onto a lightly floured surface. Knead for about 10 minutes, until the dough is smooth and elastic and springs back when an impression is made with your finger. (If the dough is still a bit sticky knead in a couple extra tablespoons of all purpose flour)
Chef's Tip: Use the heel of your hand to push the dough away, then fold it back - a steady rhythm will develop gluten more effectively.
Shape the loaves
- Divide the dough into 3 even pieces.
- Shape each into a round ball, then roll out on a floured surface into rounds about 23 cm (9 in) for thicker bread or 26 cm (10½ in) for thinner loaves.
Chef's Tip: To get even rounds, rotate the dough in a circular motion under your cupped hand until it tightens into a smooth ball.
Rise
- Sprinkle baking trays lined with parchment paper with cornmeal. Place the shaped rounds onto the trays. Reshape if needed.
- Brush the tops lightly with water and, if using, sprinkle with aniseed, sesame seeds, or salt, pressing lightly to stick.
- Cover with clean kitchen towels and leave in a warm, draft-free spot for about 1 hour, or until a slight indentation remains when pressed with your fingertip.
Preheat the oven
- While the bread is rising, preheat the oven to 220°C / 425°F / Gas 7.
Prick and bake
- Just before baking, prick the tops of the breads with a fork dipped in a little all purpose flour.
- Bake in the preheated oven for 12-15 minutes, or until golden and the base sounds hollow when tapped.
Cool and serve
- Transfer the loaves to a wire rack and allow to cool slightly.
- Cut into wedges and serve the same day.

Flavor Variations, Substitutions, and Tips
One of the best things about making Moroccan khobz at home is how easy it is to adapt to your taste or pantry. Here are some ideas:
- Yeast Options: If you're short on time, use instant yeast and skip the activation step - just mix it directly into the flour.
- Flour Options: For a nuttier, heartier loaf, swap part of the flour for whole wheat - use 500 g (3 ⅓ cups) all-purpose flour and 200 g (1 ⅓ cups) whole wheat flour.
- Dairy-Free: Replace the milk with water for a completely dairy-free version.
- Cornmeal Swap: Use semolina instead of cornmeal on the tray for a more traditional Moroccan texture.
- Seeds & Toppings: Sprinkle sesame seeds, aniseed, or nigella seeds on top before baking for extra flavor and texture.
- Crispier Crust: Brush the dough with olive oil before baking instead of water for a slightly richer flavor and golden crust.
What to Serve With Moroccan Bread
Moroccan bread (khobz) is a staple at nearly every meal. From tagines to salads and soups, here are some of the best ways to enjoy it:
- Tagines and Stews: Tear off wedges of khobz to scoop up flavorful sauces from Chicken Tagine with Lemon and Olives, Lamb Tagine with Apricots and Almonds, or a comforting chickpea stew.
- Grilled and Roasted Meats: Enjoy with Moroccan spiced chicken, lamb brochettes (kebabs), or a slow-roasted Mechoui-style leg of lamb.
- Seafood and Fish: Serve alongside our fragrant Baked Moroccan Salmon, or keep it simple with grilled shrimp and white fish.
- Soups: Enjoy warm khobz with lentil soup, harira (a traditional Moroccan tomato and lentil soup), or a simple vegetable soup.
- Salads: Use it to scoop fresh sides like Moroccan Carrot Salad, cucumber and tomato salad, or orange and date salad.
- Dips and Mezze: Khobz is the perfect edible utensil for classic Moroccan dips like zaalouk (eggplant and tomato dip), taktouka (pepper and tomato salad), and hummus.

Storage and Make-Ahead Instructions
Homemade Moroccan bread is best the day it's baked, but you can store it and enjoy later with a few simple steps:
- Fridge: Store in an airtight bag or container for up to 2 days. Refresh in the oven before serving.
- Make Ahead: Prepare the dough through the first rise, then refrigerate overnight. Bring to room temperature before shaping and baking.
- Freezer Friendly: Wrap the bread tightly in foil and place it in a zip-top bag. Freeze for up to 1 month.
- How to Reheat: Splash the bread lightly with water, wrap in foil, and warm in a 180°C / 350°F oven until heated through. This works for both thawed and frozen khobz.
FAQ's
A : Moroccan bread is commonly known as khobz or kesra. It's a round, flat loaf baked daily in Morocco and served with nearly every meal.
A : No - pita has a pocket, while Moroccan khobz is a thicker, rustic loaf. Both are great for dipping, but they're distinct breads.
A : Yes, simply use flour or semolina to dust the baking tray.
More Moroccan Recipes
Love this recipe? Try more from our Moroccan recipe collection.
- Homemade Tagine Spice Mix (Moroccan Spice Blend Recipe)
- Moroccan Preserved Lemons Recipe (Step-by-Step Guide)
- Moroccan Roasted Vegetables with Chickpeas (Harissa Veggies)
- Healthy Quinoa Salad with Moroccan Roasted Vegetables


This easy Moroccan bread recipe (khobz kesra) is the perfect way to bring authentic Moroccan flavors into your home kitchen. Baked fresh, it's golden, soft, and ready to scoop up every last drop of sauce.
If you try this bread, let us know in the comments - and don't forget to Pin it for later!
Print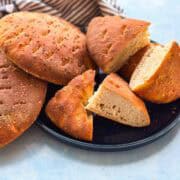
Moroccan Bread Recipe (Khobz Kesra)
- Total Time: 1 hr 45 mins
- Yield: 3 medium loaves 1x
- Diet: Vegan
Description
This Moroccan bread recipe (Khobz Kesra) makes soft, round loaves that are golden on the outside and fluffy on the inside. Baked fresh at home, this authentic khobz is perfect for scooping up tagines, dipping, or serving alongside appetizers or grilled meats. A staple of Moroccan cuisine, it's simple to make with just a few pantry ingredients.
Ingredients
1 tablespoon active dry yeast
2 teaspoon sugar
1 ½ cups (375 ml / 12 fl oz) lukewarm water
700 g (about 5 ½ cups / 1 lb 8 oz) all-purpose flour, plus extra for dusting
1 ½ teaspoon salt
125 ml (½ cup / 4fl oz) lukewarm milk
1 tbsp yellow cornmeal (or fine polenta)Topping - 1 tablespoon whole aniseed, sesame seeds or salt
Instructions
Method 1: Traditional Hand Kneading
1. Activate the yeast
-
In a small bowl, combine the yeast, sugar, and 125 ml (½ cup) lukewarm water.
-
Let it sit for 5-10 minutes, until foamy and bubbly.
2. Mix the dough
-
In a large bowl, sift both the flours and salt together.
-
Make a well in the center and add the activated yeast mixture, then add 250ml (1 cup) lukewarm water and 125 ml (½ cup) of lukewarm milk.
-
Mix with your hand or a wooden spoon until a shaggy dough forms.
-
Cover the bowl with a clean kitchen towel and set aside for 15 minutes.
3. Knead the dough
-
Turn the dough out onto a lightly floured surface. Knead for about 10 minutes, until the dough is smooth and elastic and springs back when an impression is made with your finger. (If the dough is still a bit sticky knead in a couple extra tablespoons of all purpose flour)
4. Shape the loaves
-
Divide the dough into 3 even pieces.
-
Shape each into a round ball, then roll out on a floured surface into rounds about 23 cm (9 in) for thicker bread or 26 cm (10½ in) for thinner loaves.
5. Rise
-
Sprinkle baking trays lined with parchment paper with cornmeal. Place the shaped rounds onto the trays. Reshape if needed.
-
Brush the tops lightly with water and, if using, sprinkle with aniseed, sesame seeds, or salt, pressing lightly to stick.
-
Cover with clean kitchen towels and leave in a warm, draft-free spot for about 1 hour, or until a slight indentation remains when pressed with your fingertip.
6. Preheat the oven
While the bread is rising, preheat the oven to 220°C / 425°F / Gas 7.
7. Prick and bake
-
Just before baking, prick the tops of the breads with a fork dipped in a little all purpose flour.
-
Bake in the preheated oven for 12-15 minutes, or until golden and the base sounds hollow when tapped.
8. Cool and serve
-
Transfer the loaves to a wire rack and allow to cool slightly.
-
Cut into wedges and serve the same day.
Method 2: Stand Mixer with Dough Hook
1. Activate the yeast
-
In a small bowl, combine the yeast, sugar, and 125 ml (½ cup) lukewarm water.
-
Let it sit for 5-10 minutes, until foamy and bubbly.
2. Mix the dough
-
In the bowl of a stand mixer fitted with the dough hook, combine the sifted flours and salt.
-
Add the activated yeast mixture, then pour in 250 ml (1 cup) lukewarm water and 125 ml (½ cup) lukewarm milk.
-
Mix on low speed for 1-2 minutes until a shaggy dough forms.
-
Cover the bowl with a clean kitchen towel and set aside for 15 minutes.
3. Knead the dough
-
On a medium speed, knead for 6-8 minutes, or until the dough is smooth, elastic, and pulls away from the sides of the bowl.
-
If the dough is still sticky after a few minutes, add a tablespoon or two of extra all-purpose flour.
4. Shape the loaves
-
Turn the dough out onto a lightly floured surface.
-
Shape each into a round ball, then roll out on a floured surface into rounds about 23 cm (9 in) for thicker bread or 26 cm (10½ in) for thinner loaves.
5. Rise
-
Sprinkle baking trays lined with parchment paper with cornmeal. Place the shaped rounds onto the trays. Reshape if needed.
-
Brush the tops lightly with water and, if using, sprinkle with aniseed, sesame seeds, or salt, pressing lightly to stick.
-
Cover with clean kitchen towels and leave in a warm, draft-free spot for about 1 hour, or until a slight indentation remains when pressed with your fingertip.
6. Preheat the oven
While the bread is rising, preheat the oven to 220°C / 425°F / Gas 7.
7. Prick and bake
-
Just before baking, prick the tops of the breads with a fork dipped in a little all purpose flour.
-
Bake in the preheated oven for 12-15 minutes, or until golden and the base sounds hollow when tapped.
8. Cool and serve
-
Transfer the loaves to a wire rack and allow to cool slightly.
-
Cut into wedges and serve the same day.
💡 Tip: Moroccan bread is often used as an edible utensil - perfect for scooping up tagines, dips, and salads.
Notes
Storage Instructions:
Fridge: Store in an airtight bag or container for up to 2 days. Refresh in the oven before serving.
Make Ahead: Prepare the dough through the first rise, then refrigerate overnight. Bring to room temperature before shaping and baking.
Freezer Friendly: Wrap the bread tightly in foil and place it in a zip-top bag. Freeze for up to 1 month.
How to Reheat: Splash lightly with water, wrap in foil, and warm in a 180°C / 350°F oven until heated through. Works for both thawed and frozen khobz.
- Prep Time: 20 mins
- Rising Time: 1 hr
- Cook Time: 20-25 mins
- Category: Bread
- Method: Baked
- Cuisine: Moroccan
Nutrition
- Serving Size: 1 serving (½ a bread)
- Calories: 449
- Sugar: 2.8 g
- Sodium: 615.4 mg
- Fat: 1.3 g
- Carbohydrates: 93.4 g
- Protein: 13.7 g
- Cholesterol: 0.4 mg
The nutrition is an estimate only. It was calculated using Nutrifox, an online nutrition calculator.



Leave a Reply